Tuesday, May 28, 2019

An 1830s Gown

I am crazy enough to have two projects currently planned, the 1896 ensemble and an 1830s gown. I saw this amazing silk taffeta for sale in one of my FB groups, and it's totally my colors, so I had to buy it.


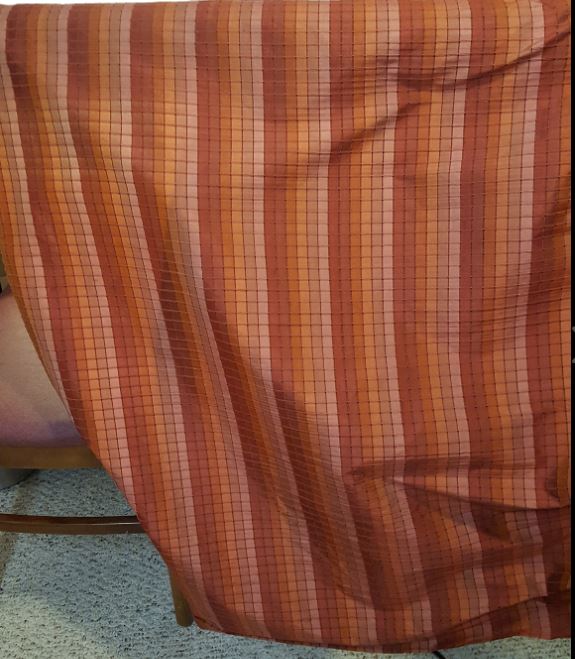
I have 11 yards, so plenty to do whatever I want. At first I was thinking 1870s because I love the long sweeping trained skirts, and I spent a lot of time browsing patterns, but the fabric decided it wants to be an 1830s dress. This is my inspiration gown (from the Met):


Those sleeves! And I love the crossover bodice, although it will take some work to figure it out. I have TV455 Romantic Era Dress on the way to use as my pattern base.

And this means new undergarments - a set of stays and a corded petticoat. I probably could use my Regency stays, but I made them out of Soyuz rocket blueprint fabric, and I've been wanting another set in a neutral color. I found one pattern from Black Snail on Etsy for the stays. I've never done true cording before (I did a few rows on a bust panel for my 1890s corset) where you make the channels and then insert the cord, so figured it was a good time to give it a try.

The pattern sizing was weird (due to European sizing, I think). The seller suggested I make the size 12 to fit my waist, use the larger bust gores, and adjust the hip gores smaller if need be. The mock-up was way too short for me, which is a common problem (I am long from armpit to hip) so I added 2" in at the waist. It also seemed a touch small even though the hips should have been too big. I decided just to use 1/8" smaller seam allowance.

The strength layer is a cotton twill, and the outer layer is an ivory cotton sateen. I am using Sugar and Cream yarn as the cording. I very carefully cut out and marked all of my pattern pieces with the cording lines. The pattern says there is allowance for cording shrinkage (this turned out to not be so true ... I had started to cut the front 1/4" wider on each side and regret that I changed my mind).

Here is my front panel with the gores inserted and the cording channels stitched but not corded. It's wet at the bust from cleaning off my fabric marker. 


What a difference the cording makes! Full panel and a close up. I love the design, it reminds me of a sunrise.


Here are the back and side panels. I decided to interface where the grommets will go, and stupidly ironed into the wrong side of the fabric, and had to leave it due to no more fabric. Sigh. It also got super wrinkly when I cleaned off the fabric marker, and I hope I can smooth it back out. The back was supposed to have a bone along each side of the grommets, but I decided to do 3 rows of cording in lieu of the second bone.


Here are a couple pictures of the whole thing. I love how the pattern flows between the panels, and am super proud the the whole thing lines up perfectly at the waist! 


Fiona had to supervise me putting in the grommets ... 17 on each side in the back. 


Then I had to figure out the fan lacing. I knew *what* I had to do but couldn't figure out the *how*. The AD blog says to fit the cord lengths on the body or the dummy, so I put it on Petunia, and just couldn't make it work. I gave up in frustration and took Jonah to Rockin Jump. I texted a friend who had just done this and she told me to lay out the cords with it FLAT, and estimate where I wanted the tabs holding the cords to end up. And it worked! Nearly perfectly!

Here is the front loosely laced onto Petunia. I think the fit is good. I haven't done the shoulder straps yet because I had THREE grommets left and need FOUR. Sigh. So I ordered more. It also didn't occur to me to sew on the straps before binding and also bind the straps. I'm going to unpick the binding across the shoulder part and redo it right. Fingers crossed I can pick apart the two layers of the strap, because I am out of sateen and can't cut another set if needed.


Fan lacing from the back - so cool! You can see why dealing with all those laces on the dummy was difficult. It was much easier doing it flat. I left the little tabs holding the cords open so I can adjust the cord lengths if needed. I think I'll have to do some tweaking to get them perfectly flat, but it's close.


Next up: the corded petticoat! I have cotton organdy and cording purchased.

Thursday, May 16, 2019

1896 Ensemble

I saw this jacket posted in my Ageless Patterns group on Facebook and decided I MUST make it. It's Ageless #1173, 1896 Braided Jacket.


I will be doing this skirt to go along with it - Ageless #2217, 1894 Brown Godet Skirt.


The original is made out of a wool or heavy cotton fabric, and I decided to use cotton velveteen. I found a Kaufman fabric I love but they seem to no longer make the blue color I fell in love with, but I found some gorgeous teal cotton velveteen on Etsy that I ordered. 


I also bought a 144-yard spool of black soutache to use for the trim. I'll mimic the scroll work on the jacket on the skirt. The original appears to use some fancy soutache and I looked at picot braid but I don't like the look of it, and I'm not even sure I like it on the jacket, so regular soutache it will be! I've never worked with that kind of trimming and I'm sure it will require many, many hours of hand sewing.

Now I have to wait for my velveteen to arrive from England, and my patterns.

Wednesday, April 10, 2019

Polonaise is done and worn in public!

I decided to wear my gown to Yuri's Night. It's a festival celebrating Yuri Gagarin, the first man in space, and the theme this year was "intergalactic chic" so I figured my gown would be perfect. I decided I was a Victorian time traveler! I got a lot of compliments on the gown and even met a few kindred sewing spirits. I definitely breathed a sigh of relief when it actually fit over my corset and undergarments.


Monday, March 25, 2019

Buttons and Bows!

I'm calling the polonaise done! I found the cutest kitty buttons on eBay. They even look like Victorian cats. And now there are bows too. Next up is a new hat!


Monday, March 18, 2019

Polonaise almost done!

I got a lot of sewing done this weekend and the gown is almost finished. It needs buttons (ordered and waiting for delivery) and some bows (ribbon ordered and waiting for delivery). I didn't have enough lace left to trim the entire skirt, so settled for the lower edge, then used my wonderful lime green fuzzy trim. I love it soooooo much!

I also added one more ruffle to the bottom of the skirt, made from the kitty fabric. The facing was supposed to be done in the fashion fabric, but I wouldn't have had enough material. I had to piece the heck out of the ruffle that I made to get it long enough. I didn't take another photo with the added ruffle, but it looks great. I also made a small stuffed kitty that will go on my hat. I think I'm going to use my bat hat for this one and just replace the bat with the kitty, but I might do another hat as I have other patterns I want to play with.


Monday, March 11, 2019

Skirt is done - and tunic in progress!

It took most of the weekend, but I finished the skirt. Sitting on the floor pinning ruffles was challenging with my hip still stiff, so I only did 3 tiers on Friday. Saturday I was able to sit in a chair to do the remaining 7 ruffles. I think Petunia looks like a can-can dancer!


I had some problems with it. The directions said to fold up 1/4" twice for the ruffle hems. I serged, pressed, and folded, which was only about 3/8" total, and the ruffles were still too short for each marked line, so I had to adjust. I was really careful marking all the lines for ruffle placement. I'm going to add one more layer at the bottom in my cat fabric.

On to the tunic. I really didn't want to do a mock-up. Or flatline. I'm not sure I even have enough stash fabric to do it. I held up the pattern to Petunia and decided the waist was long enough (Victorian patterns tend to be short in the waist on me and usually need lengthening), and figured I'd adjust the rest with the darts. Well, it turned out PERFECT! I might need a couple tucks in the neckline, but otherwise I think it's going to be great, and looks wonderful with the skirt.

I had challenges with this too. I painstakingly marked everything with my tracing wheel, and all the marks faded so quickly I couldn't use them. Sigh. The inverted box pleats at the center back stymied me for some reason and it took about an hour to figure them out. I even had to resort to pleating up a piece of twill tape for practice! But I won in the end. 

The sleeves are mostly done and ready to set in, so that will be the next step. I found some adorable cat buttons that I'm not sure will look good, but we'll see. If not I will likely just cover buttons.


Tuesday, March 5, 2019

Skirt progress

I finally got some sewing done! For the polonaise, I only bought fabric for the tunic, and was determined to use stash fabrics only for the skirt. It's been dubbed the "frankenskirt" because it's two different kinds of linen and some cotton. I tried it on over my lobster tail bustle, but there wasn't enough length allowed in the back to fit over a bustle, as you can see in the side photo.


This skirt has 10 (!) tiers of ruffles. It took forever to cut them all out to the lengths specified in the pattern. Here they are ready for gathering. I ran all the long edges through the serger, and pressed up one edge and machine hemmed. I decided I didn't really want to gather all that fabric with the traditional method, so I bought a ruffler foot and a gathering foot for my machine and will play around to see if one of those works. Here are the hemmed and pressed ruffles waiting for gathering. I had perfect colors in stash to go with my cats in space fabric!

The giant R2-D2 post

I've been bad about updating on my latest project - a Victorian R2-D2 gown! I have a whole group for Costume College who also want to cr...