Showing posts with label ButterflyGown. Show all posts

Monday, September 11, 2017

I think it is finally done!

I put the finishing touches on the gown, and am calling it done! I can't wait to do my photo shoot and get really good pictures of me wearing it. I want to make some kind of hair piece to wear, and ordered a few supplies. I had one pearl fall off the over skirt trim, and I stitched a new one in but it doesn't look so good. I think I can hide it in the ruffle though. Also some of the eyelet stitching in the back came loose when I laced the bodice, so I need to fix that. But I am really happy with how it came out. I wasn't wild about the green fabric initially, but after it all came together I love it. I think the little roses really helped the bodice to look more elegant.


Tuesday, September 5, 2017

Nearly finished!

I am in the final phases now. I found some lovely pearl trim that went onto the overskirt. It took many hours of hand sewing to attach this, and unfortunately there are a couple spots where pearls were missing. I am going to try sewing an additional one into the gap though, or maybe some super glue. But it looks really good! And I did a big bow on the back, although it's a bit floppy and I might redo it with some more structure.


I also made some adorable origami fabric butterflies for the bodice. I love how they turned out! Even with those, I think it's still lacking some oomph. I ordered some little satin roses that I'm going to try in the center of each box pleat. And I made a bow in the blue fabric for the left shoulder, but I need to try it on to decide exactly where to attach it.


Monday, August 28, 2017

Bodice makeover

I spent a lot of Friday morning playing with the chiffon sash for my bodice, and decided in the end that I HATED it. I had seen another bodice I liked with box pleat trim, and decided to copy that. Here's a photo of it just pinned on, but I have it all tacked on now with little seed beads. I also made some adorable fabric butterflies to attach on one shoulder. I'll get those done and a final bodice pic. I love how it looks!


I also found some great teardrop pearl trim that I will use on the overskirt as my white spots. And ordered a new chemise pattern for a ball gown chemise that is low cut, since the one I made is not working, even tucked in.


Monday, August 21, 2017

I'm in the home stretch now!

Everything is coming together and I got a lot done this past weekend. I sewed ribbon on the ruching on the under skirt. It is finished, although I do have some lace butterfly appliques I might sew on.


The over skirt still needs its white spots, possible trimming back of the black ruffle along the front edges, and a big black bow on the butt!

The bodice is also nearly finished. I got all the edges bound, using self-made bias strips, and boning is attached. I tried basting in a sleeve out of my silk chiffon and it looked horrid, so sleeveless it is. I am going to do a sash out of the chiffon though, and am going to bead it with ocean colored seed beads. I think I am going to back the sash with some of the satin, but want to see how that looks. Here are some views with/without the sleeve and sash, and the nearly finished bodice. Clearly my chemise is not working, but I found a pattern for a ball gown chemise that I ordered and will make.


Monday, August 14, 2017

Bodice fitting

Let me just say that trying to fit a bodice by yourself is not an easy task. I decided to do spiral lacing up the back, and trying to explain to my 10-year old son how to tighten the lacing, plus the accompanying moans and groans at having to help mom out, was not so much fun. 

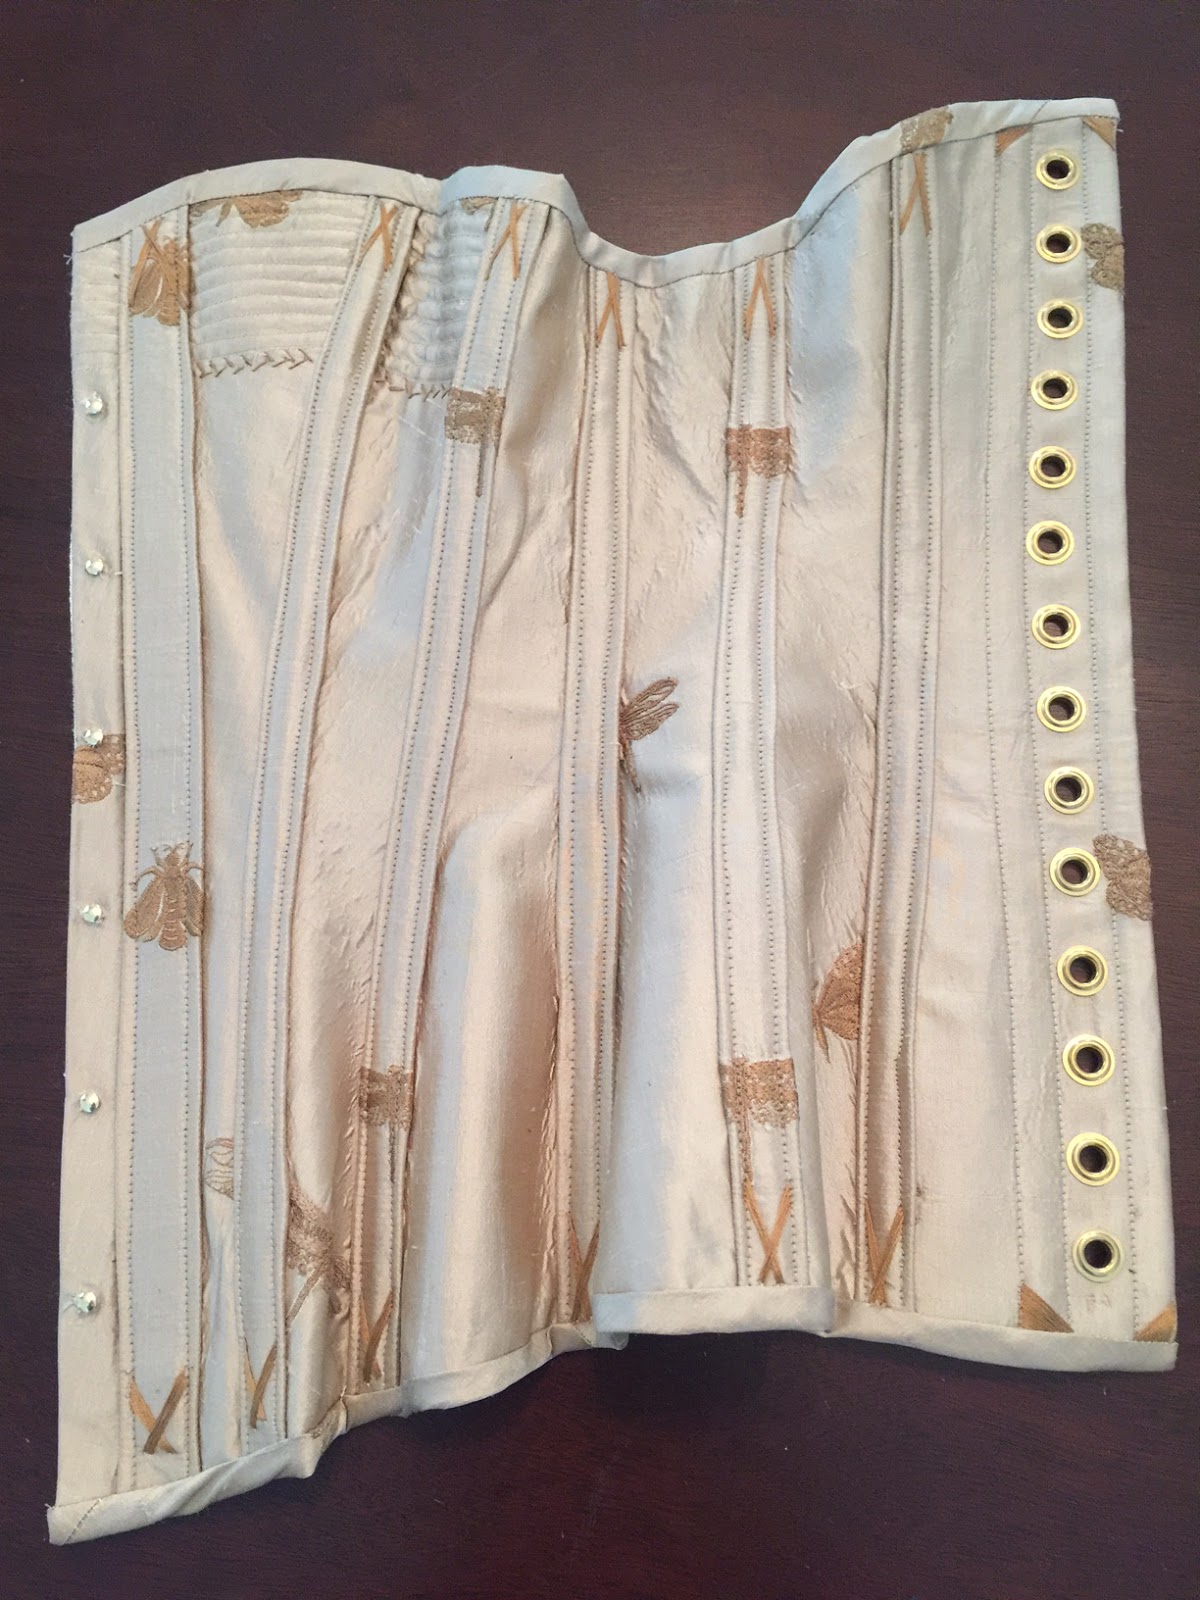
The bodice is the same satin as the under skirt, flat-lined with some super cute cotton butterfly fabric. I decided to couch all the eyelets so they would look like hand-made eyelets - I do not hand sew well enough to do hand-made eyelets. It took forever to stitch 31 eyelets (odd number since I'm spiral lacing) but I think it came out pretty good.  

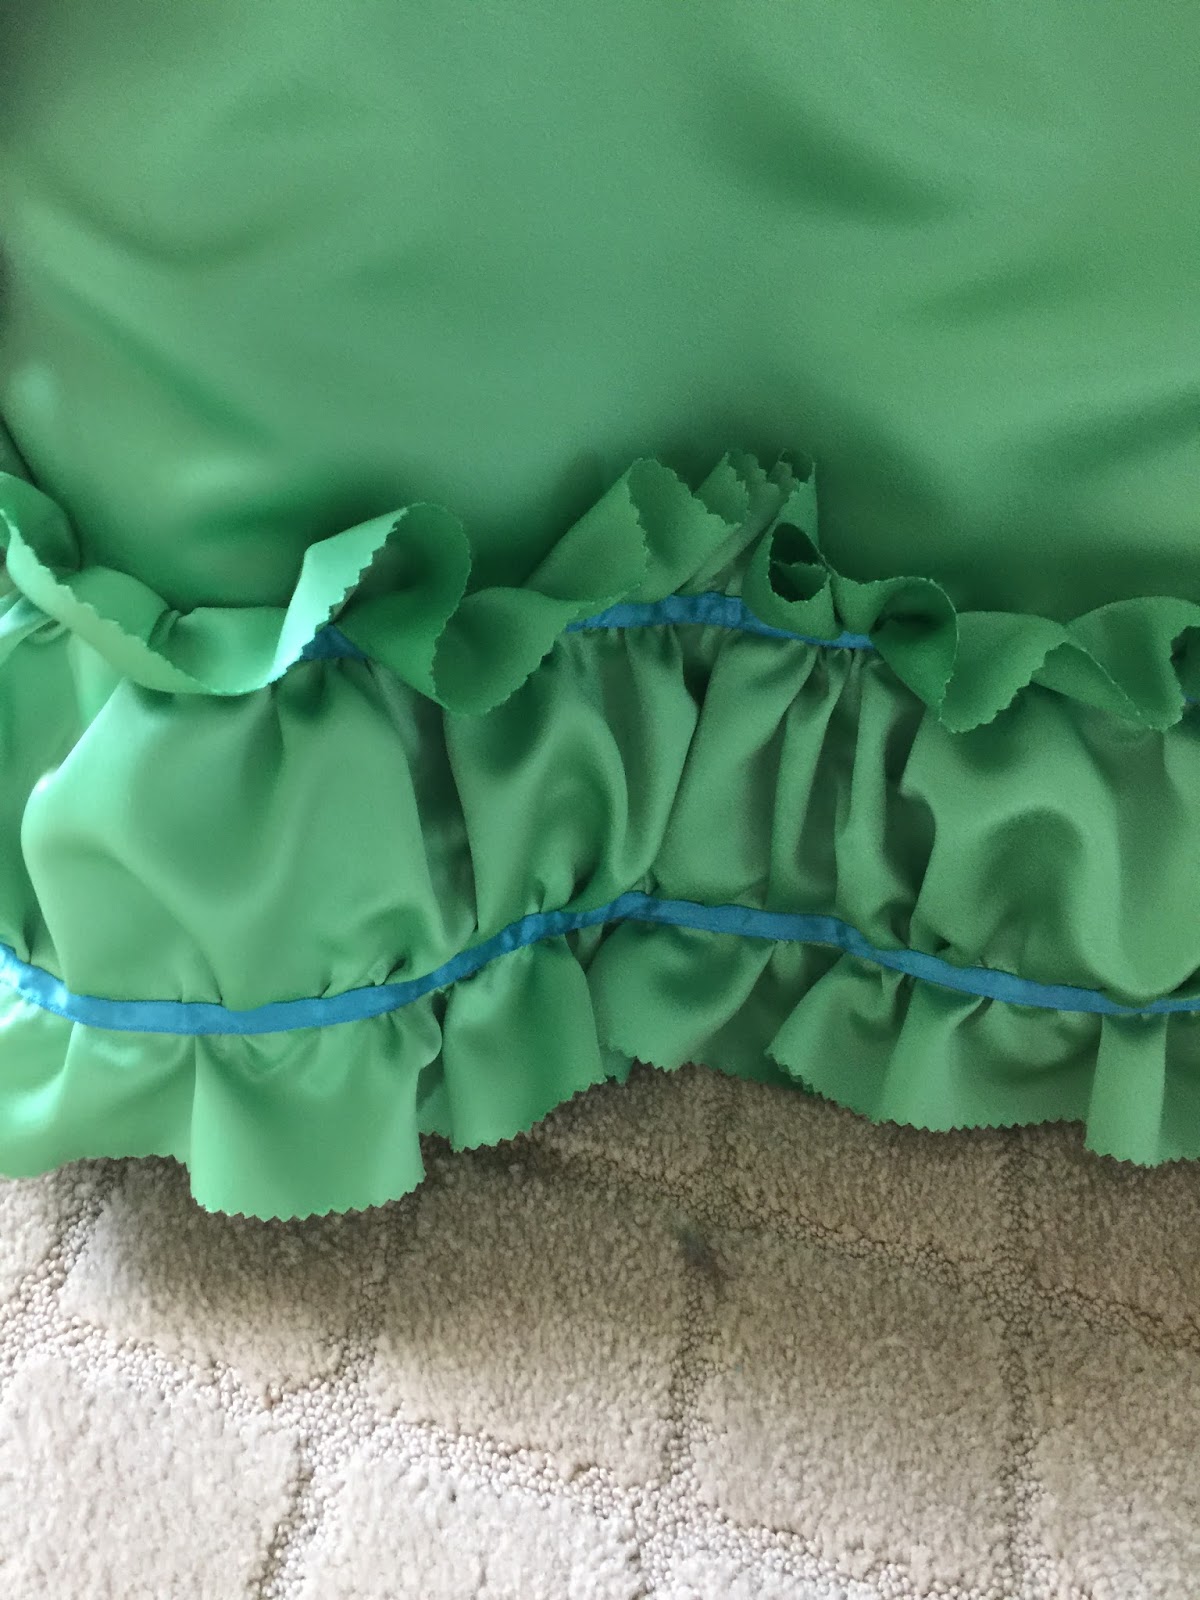
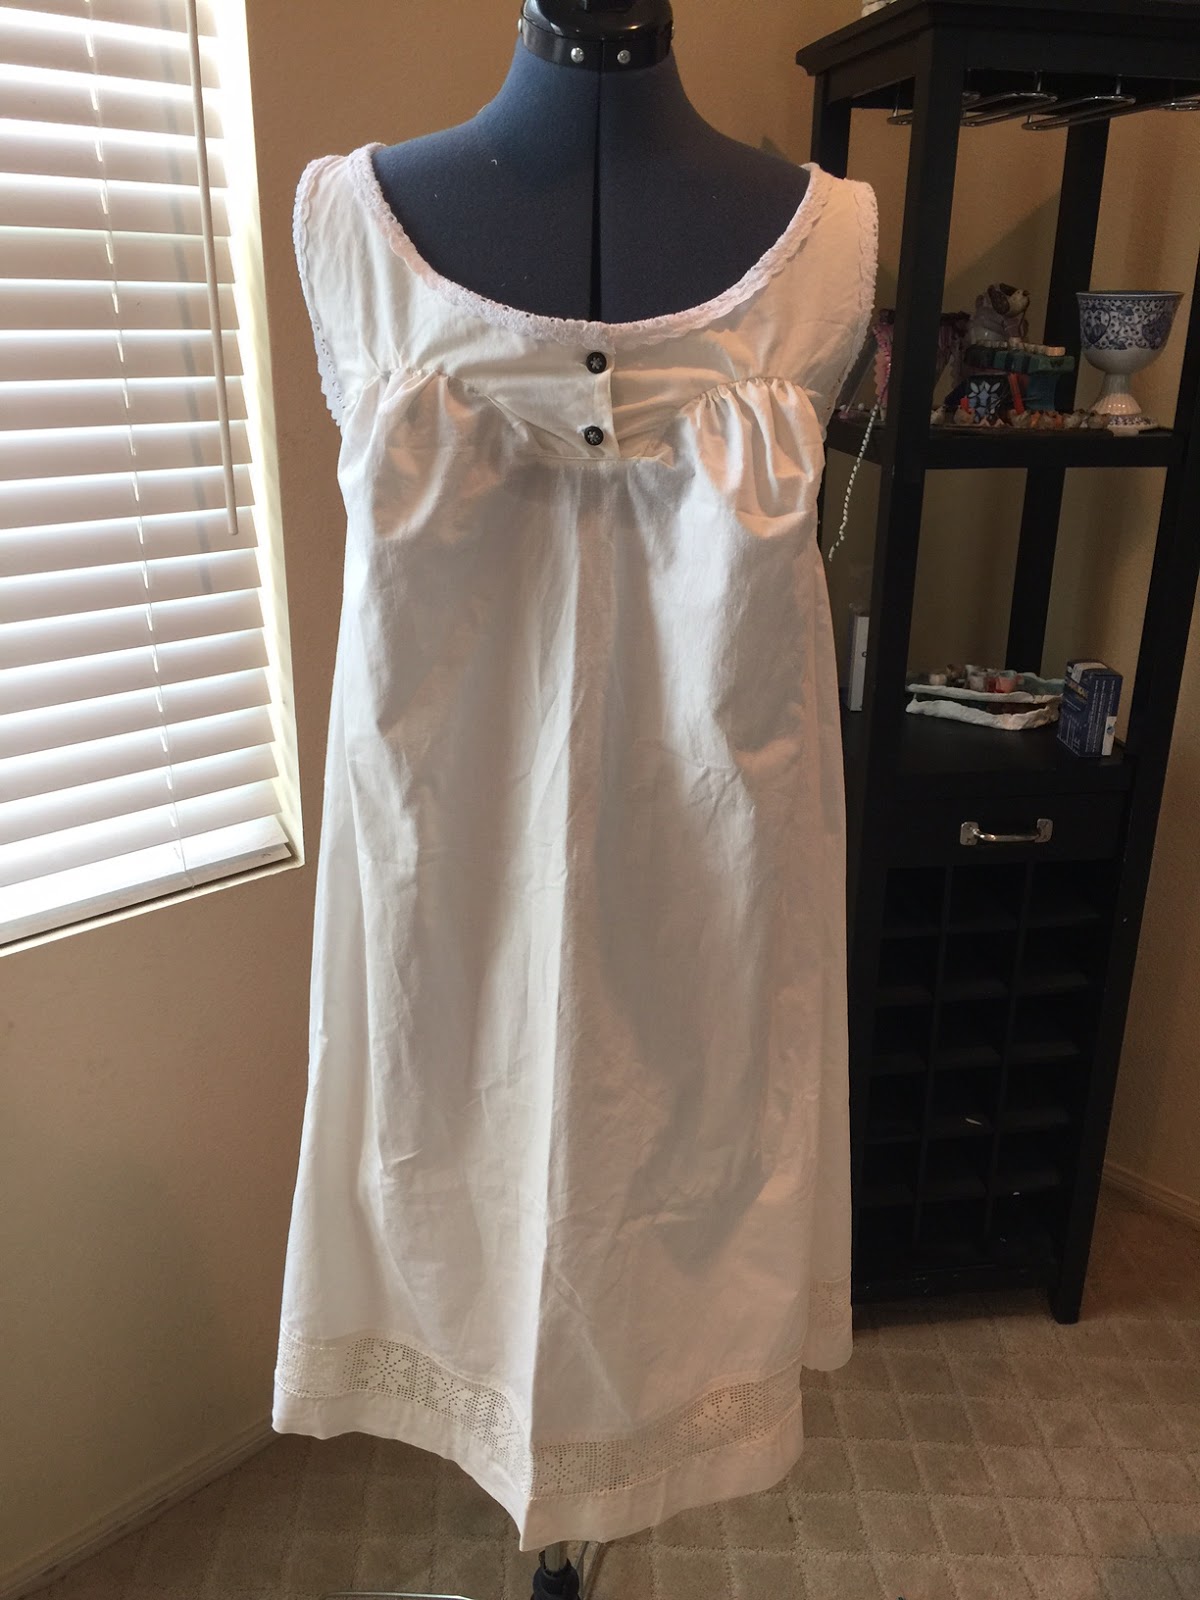
I knew that the mockup was a bit big. I decided to go ahead and make the bodice and fit it afterwards, since I will be finishing my inside seams (and covering with boning channels). I knew the armhole needed to be a tad bit bigger so stitched my shoulder seams at a lower seam allowance, and that worked out perfectly. The back over the butt/hips was too big but I think I figured out where to take it in. The bustline also gapes in the front, so that will be taken in (the pattern notes this seems to be a common issue). I am seriously considering putting in a hidden front opening of some kind though, as the spiral lacing is a major PITA to get in an out of. I put in 5 yards of ribbon, which is too much, but regardless it needs to be long enough to loosen it to get on/off, then you have a lot of extra ribbon hanging down. Here is the pinned bodice, back and front (doesn't that train just look delicious in the back? OMG I love it.). Yes, I should not have been standing in front of the window when taking these, but it's enough for me to see that the fit looks pretty decent now, so I just need to adjust the seams and try it on again.


The sleeves will be a lovely pale green silk chiffon, and I am going to do some kind of draping of chiffon at the neckline. I intend to bead it and bought a beautiful mix of seed beads in an ocean color theme mix. I am going to bind the upper and lower edges with self-made bias in the same fabric.

Monday, August 7, 2017

Both skirts are almost finished

I made a lot of progress this past week with my kids gone! Funny how that happens. The under skirt is ruched, I just need to add some white ribbon over the gathers. I like how it turned out. 


The over skirt has been a bear. A lot of fabric management, and very poor directions on the pattern. I believe there is supposed to be a burnous pleat in the back, with a back closure, using the pleat as extra space to get into the skirt. The skirt is supposed to be mounted to the under skirt so that makes sense. I decided to make it a separate skirt though, and decided to put the opening in the front. I think I am still not quite understanding the scanty directions because there is NO WAY that this would be small enough to fit the listed waist size, no matter how I interpret the directions. So, I just started playing with it and draping it on Petunia (my son named my dress form ...). I think it looks reasonably like the photo. Boy is it heavy! I tried it all on so I could do a bodice fitting and noticed one set of my hip pleats was way forward compared to the other, so I fixed that. This skirt is done other than I need some kind of white spots on my black ruffle, and am not sure yet if I will (a) paint them, (b) sew on beads, or (c) use a beaded tassel trim. I am leaning towards option (a). I also may trim back the black ruffle along the front edge to a narrower width so you can see more of the under skirt.


Now if I could just get the cats to stop sleeping on the train ....


Friday, August 4, 2017

Under skirt progress

The under skirt is almost done, other than trimming it. I was sewing along with my serger to flatline my skirt pieces when a thread snapped on the serger. I haven't re-threaded it in forever, and with my nails and poor eyesight for detailed things, it took about an hour and a half to get it working again. I have a lot of trouble with my lower looper thread, I get it through and then it snaps when I start sewing. I also mistakenly serged one seam on the wrong side of the fabric, so had to cut it off and start over.

The finished skirt pattern is a few inches smaller, so I omitted the darts and made the box pleats smaller to get it to fit. Also I only had two hooks/bars so for now it will have to do.

I got the lace butterfly appliques on eBay, and am playing around with placement. I won't be able to finalize until I get the over skirt done and see how it drapes with the under skirt, but I think they will look nice. The lower edge trim is going to be an 8" wide panel that I am going to ruch with two lines of gathering, then sew white grosgrain ribbon over the gathers. I think it will look nice.

The original pattern has a much bigger booty, so I might need my bustle pad on top of my bustle!


Thursday, July 27, 2017

Over skirt progress

I got the ruffle pinned and sewed to the over skirt last night. This skirt is roughly 144" wide by 60" long at its longest point, so even cutting it out was a chore. I had 3 6-yard strips of black taffeta left over from my bat dress, and estimated that would be perfect. I gathered all 18 yards and started pinning. I got really lucky and did not break a single gathering thread! When I sewed it onto the skirt I was obsessively checking my bobbin every few pins to make sure it wouldn't run out - there is nothing worse than running out of bobbin after you've already pulled pins. Luckily the bobbin held. This is only half of the finished piece, I couldn't get the whole thing in the camera! I wanted to attach the ruffle before doing all the pleating. I am not sure this is historically accurate, but I'm okay with it. I am planning to sew the lining to the skirt right sides together and flip it, then baste across the top edge before doing all the pleating, as I want it to be semi-reversible for the underside of my butterfly wings. I am happy with how this looks so far, and can't wait to get the skirt pleated up and attached to a waistband! I want to do some kind of white spots on the black, and will probably use the fabric paint I used on the underside.


Monday, July 24, 2017

The corset is done!

The corset is finally done! Boy do I hate flossing. It took several sessions and a lot of stabbing myself before I finished it. And the fashion fabric started to fray a bit on one of my boning channels, so I had to fix that. Overall I am happy with this corset. The fit is nice. I noticed in the photos of the back that it looks like the boning is buckling a bit. The flat steels that I am currently using seem pretty flimsy, and I probably should have doubled up on the bones. I am not sure if I will fix it or not, as that will also require removing the flossing and redoing that too. Ugh. I also did not do the lacing properly so I need to fix that. 


Tuesday, July 18, 2017

Weekend progress

I got a lot done the past few days. I have finished flossing about 75% of the corset. I hate hand sewing, and am not good at it. Flossing is hard work requiring use of the thimble to work the thread through multiple layers of fabric. I was supposed to do a different design on the back panels but that was beyond my sewing skills, so opted for the same all around. Here is the half that is finished:


I also spent time cutting out the over skirt panels. Working with a pattern piece that is 80x60" was not fun, especially with the cats "helping". I also made some weird mistake cutting out the second piece of two, and it was a bit smaller at the bottom edge, but I decided just to trim them even and have the train a couple inches shorter. No biggie. I was thinking of trying to add a piece to it and covering with trim but I'm not positive how I want to do the trim yet.

I used the fabric paint I bought (Jacquard textile paint) to do the eye spots on the lining layer of the over skirt, which will be the reverse side of the butterfly wings. I am not sure this will ever be seen, or if I will make it fully reversible, but I wanted to do it anyhow. I spent a lot of time fiddling around with circular objects to make precise templates, then decided it looked better in a more organic shape and less precision. 


And last but not least, I needed a new chemise, as the one I have has too high of a neckline to wear with an evening bodice. My mother recently sent me a ton of old table linens that belonged to my grandmother and great-grandmother. I found a perfect tablecloth to turn into a chemise, and took advantage of the lace edge so that I didn't have to hem it! I used my Laughing Moon #100 Victorian undergarments pattern. I think it came out nice!


Wednesday, July 12, 2017

Corset is almost finished


Last night I got the boning channels and upper binding done on one side. I was hoping to use my lovely new set of bias tape makers for the boning channels, but with the thick duck canvas I used they would not fit into the bias tape maker. Sigh. So I had to measure each one as I was ironing it. Even though I used my 1/8" sewing foot, my sewing on some of the boning channels is still crooked or too far from the edge. I am not sure if I should rip it out and redo it, since it will leave holes in the silk. But the one in this photo really bothers me, see how far away from the edge it got?

Hopefully tonight I will get the other half done and can get the boning cut and put in. This corset uses a 1/2" bone next to the busk (which is good because the busk I bought seems pretty flimsy). Then I just need to bind the lower edge and do all the flossing. Almost there!


Tuesday, July 11, 2017

Phase I: The Corset

I am currently working on the corset. I am making this corset from Jill Salen's book "Corsets: Historical Patterns and Techniques".


I found a lovely tan silk embroidered with butterflies, dragonflies, and flies for the fashion fabric, and have white coutil for the strength layer. After measuring the pattern in the book, I figured it was pretty close to my measurements, so I scanned it to PDF and enlarged to 200%, then traced out and added 1/2" seam allowance. The mockup was a bit big on me, particularly in the under bust, but I am treating this as a single layer corset by fusing the silk to the coutil, so I went ahead and made it up. I took in the 1/2" seams to 5/8" instead, and it was still too large in the under bust, so I took in the top few inches of each seam a tad bit more, and now it fits. This was my first attempt at cording, and it came out decent. Not perfect, but okay for a first try.

Last night I fused more silk to some cotton duck and cut strips for the external boning channels, and cut bias strips for binding out of the silk only. I have the grommets inserted and the corset is ready for boning channels.

Welcome and Inspiration

Welcome to my blog, where I will be posting about the 1880s butterfly gown I am creating for the Foundations Revealed 2018 Competition.

The competition theme this year is insects. I have always been inspired by butterflies for many reasons, so decided on a butterfly gown. When browsing for inspiration, I came across photos of the blue morpho butterfly, and knew this was what I wanted to shoot for.


I wanted to do a late 1880s trained gown. I was inspired by one of the many beautiful Worth gowns out there, but couldn't find suitable fabric to attempt a reproduction, and it didn't fit the theme for the competition. I also wanted to make a ball gown for a local winter ball coming up this fall, so thought I could kill two birds with one stone.

My vision for the gown is an under skirt and evening bodice in a sort of lime/apple green, which is the color of the chrysalis form of the morpho butterfly. I haven't yet found the right color fabric but I will get there. I want to do sleeves and trim on the upper part of the bodice in a silk chiffon, that I plan to bead. The bodice pattern is Ageless Patterns #1442. The under skirt and trained over skirt are from Ageless Patterns #1213. The trained skirt is going to be bright blue on the outside, with black ruffled trim, to look like the butterfly. The underside of the trained skirt (lining layer) is going to look like the brown underside of the butterfly. I plan to sew ribbon around the edges and use fabric paint for the eye spots. I bought moire fabric in bright blue and brown.


The giant R2-D2 post

I've been bad about updating on my latest project - a Victorian R2-D2 gown! I have a whole group for Costume College who also want to cr...