Tuesday, March 17, 2020

The giant R2-D2 post

I've been bad about updating on my latest project - a Victorian R2-D2 gown! I have a whole group for Costume College who also want to create Victorian Star Wars gowns. 

I was originally thinking natural form, since I love the long swooping trains, but I realized that a hoop skirt has the R2-D2 shape. First I needed new undergarments - corset, cage crinoline, and petticoat. I used the Redthreaded 1860s gored corset and TV142 walking cage crinoline and free petticoat pattern.


The corset is a single layer of coutil with internal boning channels made from twill tape. I found this beautiful peach floral coutil.


The crinoline was pretty easy, although I mis-measured some of the casings, but was able to adjust it. The free petticoat pattern was easy, other than a lot of gathering!

Now on to the gown. I wanted to keep it historically accurate, so went with white silk with blue accents. I found a great seller in India for white silk taffeta. I used TV442 for the bodice and TV242 for the skirt. TV bodices fit me very well and I didn't have to do any alterations. 


I just love the swooping back seams on Victorian bodices, and the giant skirt gives a very slim waist illusion.


The sleeves are so floofy! I lined them with the blue that I'm using for skirt accents. The bodice is lined with a fun Star Wars cotton print I found on Etsy.


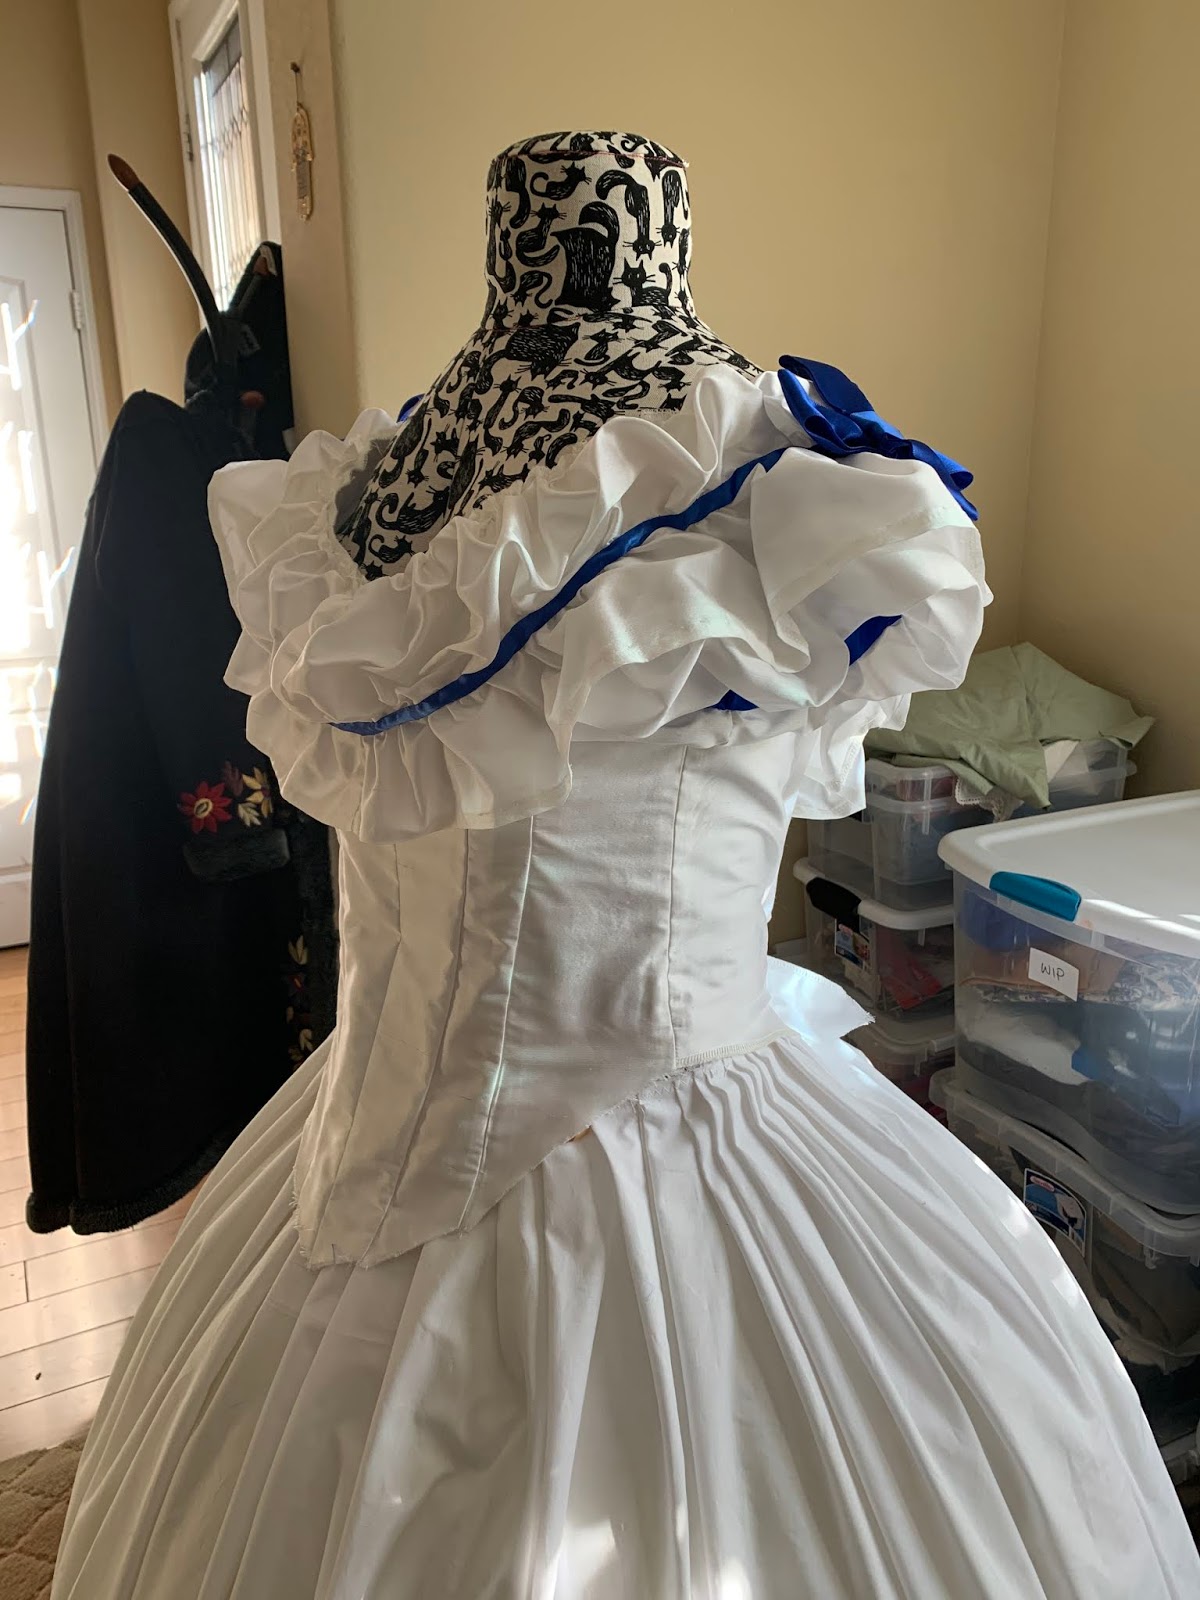
Bodice with bertha and trim attached. I bought 4 different sizes of royal blue ribbon on sale at Joanns.


Under skirt complete. I used white cotton for the upper part since it will be hidden, and the ruffles are silk taffeta. TV had a great suggestion to gather the ruffles over a cord, which worked beautifully and prevented broken gathering threads. The skirt is 3 panels so it's a lot of fabric!


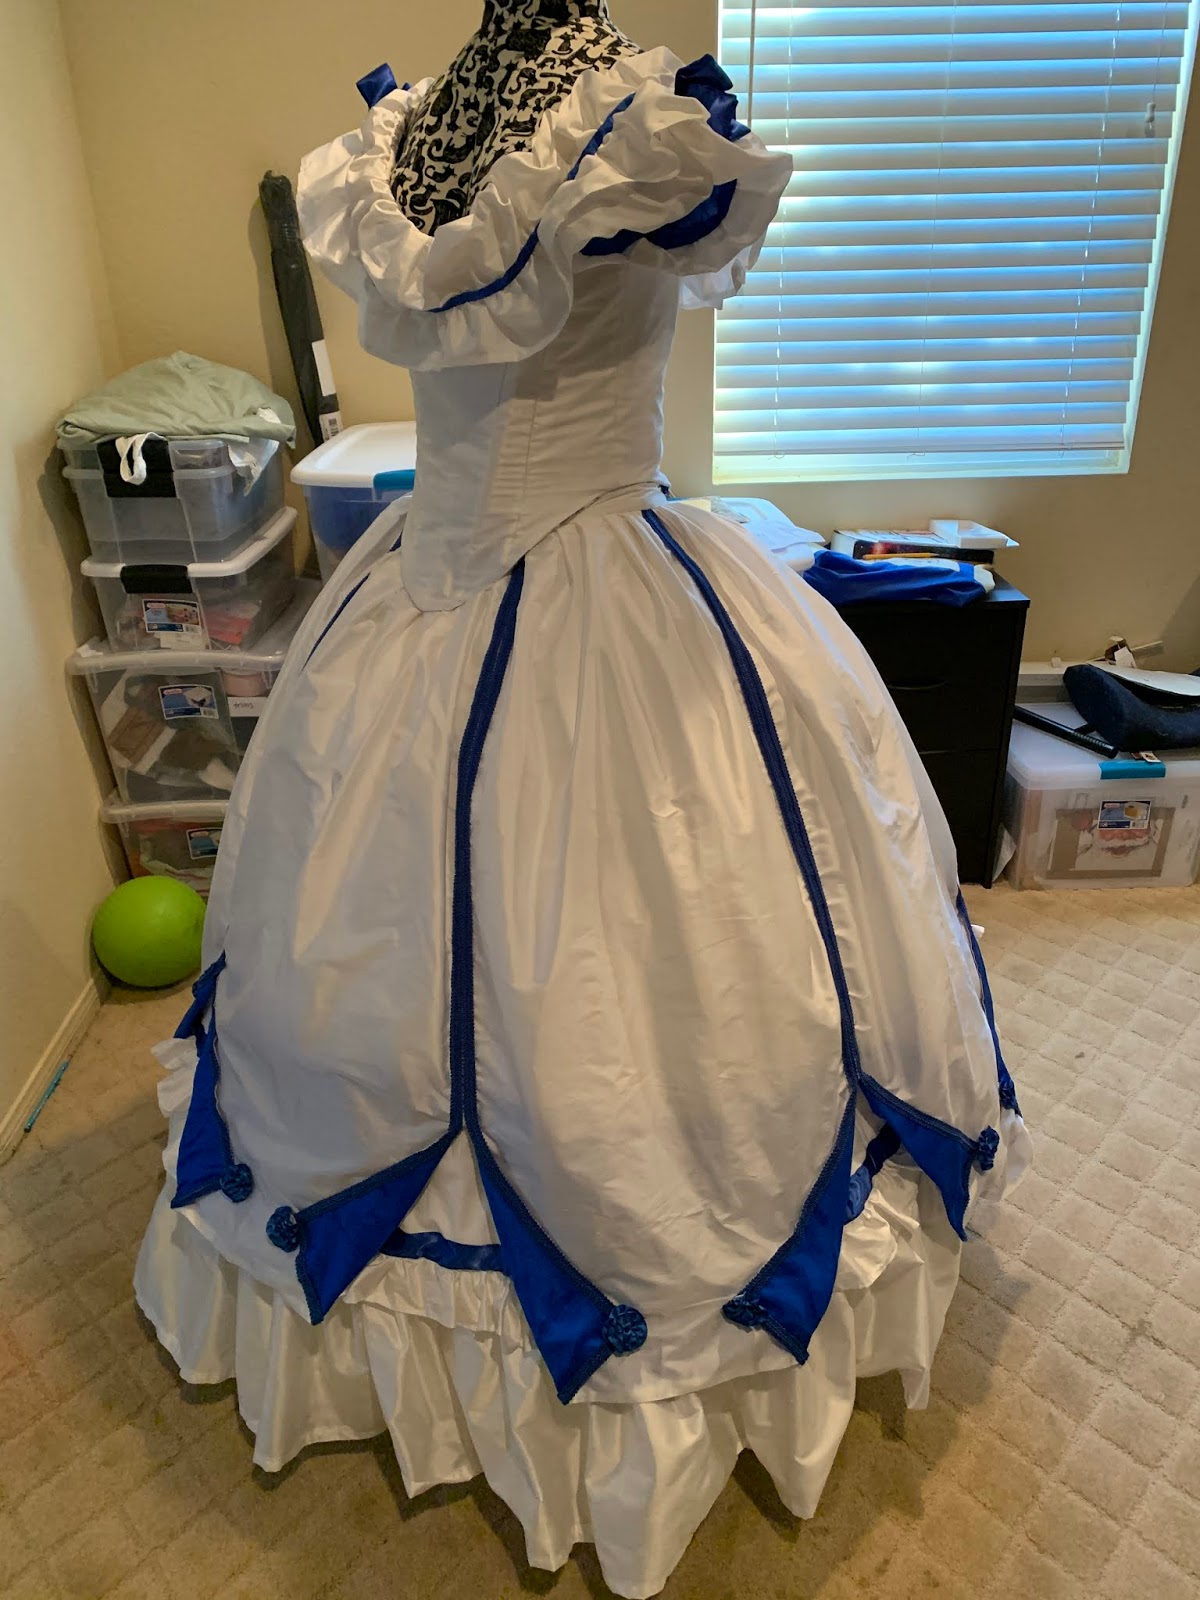
The over skirt was a bit of a beast. I didn't realize that the blue of the facings would show through the white silk, and was unhappy with it. I also had trouble finding a good royal blue trim for the skirt. The first one I ordered was too teal and didn't look right, so now I have 20 spare yards of teal braid. I ended up removing the rosettes and sticking some white fabric into the skirt lower edges, and I'm much happier with it. I was too lazy to make ribbon flowers so I bought those on Etsy. I've added some giant rosettes with help from Bobo.


Now on to the headpiece. I decided to go with a coronet style, shown above. This is the part that will really make it R2-D2. 


This was my tentative layout. I had the pearls left over from the butterfly gown and ordered the gems.


After stitching on the ribbon and pearls. The silver part is actually a tire cap painted silver, and I used a nickel for the base, plus some square silver rings. Excuse the dorky bathrobe pic, but I love how it turned out!


For shoes, I'll be wearing my Irregular Choice R2-D2 heels. Totally not period appropriate, but very R2 appropriate!


The last thing to make is R2's life form scanner, which I'll either stick in my hair or add to the coronet.

And a few cat tax photos. Of course they have to help with everything!


Monday, September 30, 2019

1894 Skirt

I got the skirt done for my 1896 walking ensemble this past weekend. 

I'm using Ageless Patterns #2217, 1894 Brown Godet Skirt. The original is made out of a brown wool and I can't wear wool, so I opted for a gorgeous teal cotton velveteen. 


The pattern says the skirt is for a 25" waist. I measured out my pattern pieces to figure out where to add, and the measurements added up to 29.75"! After double checking, I decided to just cut as is. The original has the three back panels flat lined and a 6" horsehair braid facing on the front panels. I flat lined the back in silk organza.

Gratuitous cute kitten picture, "helping" me with the skirt panels.


I flat lined the back panels and sewed them together. There is an opening left on the left side of the skirt. I sewed together the front panels then had to do a lot of futzing and thinking to figure out how to attach the front to the back, with the burnous pleats ("godets" mean "gores" according to online searching, but these are burnous pleats). I decided to hem the tops of the back panels first, as you can see here. I use my serger for flat lining - totally not HA, but as a bonus you get nice finished seams. I also made a 3" hem facing and hemmed the back panels before attaching to the front.


I finally figured out that the side front to side back seam had to be sewn leaving the 5/8" seam allowance at the top for the waistband, so I pinned the back 5/8" down from the upper edge. The seams didn't match at all, the front was about 3" longer than the back. I checked the pattern pieces and they didn't line up either. I wanted a hem facing on the front anyhow, so I just let it be. This is also the reason I decided to hem the back at the lower edge before sewing the side seams.


The front has a 6" strip of horsehair braid in the hem, which I covered with a hem facing. Since it's so deep I had to do a lot of pleats in the facing and it's a very ugly hem job on the inside! Since it was so far up the skirt I just whip stitched it into place instead of slip stitching like I would usually do.


The burnous pleats aren't attached to the waistband at all. They are folded in half, and tacked together about 1" at the side seam of each piece. The extra seam allowance I left on the front is what is attached to the waistband. The slit that was left in the back is hidden in the pleats and how the skirt opens. The pleats seem to be standing out a lot more than in the drawing photo, but that might be the velvet, I'll play with them.


The final step is the soutache on the hem. I haven't drawn up the pattern I want to use yet.

Note Petunia is not wearing her petticoats in these photos and I imagine the skirt will look much better once she has them on!

Monday, August 19, 2019

1830s gown is finished!

My 1830s gown is finished! Sewing on all those hooks and eyes was a pain. I ended up leaving the skirt and bodice separate. I used two hooks and bars on the "belt" of the bodice and regular hooks and eyes for the rest.

After that it was time to make a bonnet and pelerine. I used the Black Snail 1830s bonnet and pelerine pattern. Hats are so much fun to make, and this one was done entirely by hand (with the help of spray glue - amazing stuff). It starts out with a buckram frame with wire sewn to it, then is covered in flannel. Here's the crown of the hate, then the frame covered in flannel.


Then the hat is covered in fashion fabric. I used the leftover cotton sateen from my stays, and glued all the fashion fabric instead of basting it. 


Appa got neutered the day before, but he was still up for helping me cut out material. Note the slightly glassy-eyed look though.


This is the first hat I've done that uses bias binding to finish the edges, and I really love the way it looks.


Appa was also REALLY interested in helping me sew the lining into the hat!


Finding matching ribbon for the plaid was difficult. Red was too red, orange was too orange. I ended up with this soft pink and am happy with it.


The pelerine was super simple - sew collar, sew edges together, turn, and add a hook and eye. I used some lovely cotton eyelet I got on eBay. I hope it won't be too tight in the neck when I'm wearing it. I did measure my neck and used the recommended pattern size. It seems a shame to cover up the gown's beautiful neckline with this, but for day wear it's required.


Now all I have left to do is finish up my hair pieces, and it's ready to be tried on and photographed!

Tuesday, July 9, 2019

1830s Bodice

My bodice is finished other than needing closures!

The original gown has a faux wrap front bodice, and closes in the back. There's also a corded trim around the neckline. I didn't want to sew actual curved cording channels, so I bought some narrow black cording to pick up the little black dots in the silk.

I used leftover cording from my petticoat for piping, that is 5/32" wide. I think now that I'm done it looks a little chunky, but no way am I starting over.

I did the back first, flat lining the bodice pieces and piping the side back seam. I really had to let my OCD go on the plaid matching - you see all kinds of wild non-matched plaids in the period, but it was hard for me!


Then I made the front lining and basted it to the back at the sides and shoulders. Forgetting that the front was supposed to be done on the bias, I first tried it like this. It looks pretty good, but when I posted in my 19th century group, someone suggested bias. 


So here it is draped on the bias, much better. It hugs the torso better. I forgot that I needed to do the cording on the upper edge and didn't leave a wide enough pleat. And the center front of the lining needed to be taken down.


And here it is after it is all constructed! I piped every single seam. I stupidly cut down some of the fashion fabric along the upper edge on one side, which made hemming the lining to it difficult.


Then I had to try it on with the skirt, just to get the effect. No corded petticoat in this picture so the skirt doesn't look as floofy.


Since the sleeves are so enormous, I thought doing the neckline trim would be easier without them. I spent a long time playing around with this and almost gave up. I tried a separate facing which looked really nice but it made the neckline too far away from my shoulders. In the end I went with a fairly narrow pattern to work with the width I had available, and am happy with it.


Our new kitten Appa was helping me with the cording.


Then it was finally time for the sleeves of giant ridiculousness. Bobo had to help me cut them out. Each sleeve uses a full yard of fabric! I had to cut them 2.25" wider at the center so I could do the pin tucks on the lower arm like in my inspiration gown.


I'm terrible at pin tucks, but I tried my hardest to keep them neat using my 1/8" foot. I didn't line the sleeves because the taffeta is pretty stiff on its own, so I piped the lower edges. 


Here's the whole thing with the giant sleeves! That's without sleeve plumpers!


Close-up of the finished neckline, which I'm happy with.


And a sleeve close-up.


I've decided to keep the skirt and bodice separate. I'm attaching a placket to the skirt and everything needs closures. I hate sewing hooks and eyes, sigh. But otherwise it's finished! Next up, a pelerine and bonnet, and work on the equally ridiculous hair.

The giant R2-D2 post

I've been bad about updating on my latest project - a Victorian R2-D2 gown! I have a whole group for Costume College who also want to cr...