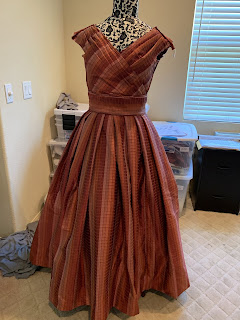
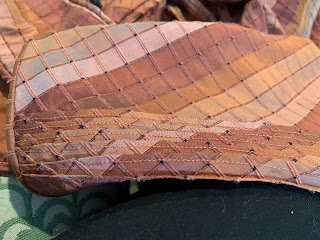
The original gown has a faux wrap front bodice, and closes in the back. There's also a corded trim around the neckline. I didn't want to sew actual curved cording channels, so I bought some narrow black cording to pick up the little black dots in the silk.
I used leftover cording from my petticoat for piping, that is 5/32" wide. I think now that I'm done it looks a little chunky, but no way am I starting over.
I did the back first, flat lining the bodice pieces and piping the side back seam. I really had to let my OCD go on the plaid matching - you see all kinds of wild non-matched plaids in the period, but it was hard for me!
Then I made the front lining and basted it to the back at the sides and shoulders. Forgetting that the front was supposed to be done on the bias, I first tried it like this. It looks pretty good, but when I posted in my 19th century group, someone suggested bias.
So here it is draped on the bias, much better. It hugs the torso better. I forgot that I needed to do the cording on the upper edge and didn't leave a wide enough pleat. And the center front of the lining needed to be taken down.
And here it is after it is all constructed! I piped every single seam. I stupidly cut down some of the fashion fabric along the upper edge on one side, which made hemming the lining to it difficult.
Then I had to try it on with the skirt, just to get the effect. No corded petticoat in this picture so the skirt doesn't look as floofy.
Since the sleeves are so enormous, I thought doing the neckline trim would be easier without them. I spent a long time playing around with this and almost gave up. I tried a separate facing which looked really nice but it made the neckline too far away from my shoulders. In the end I went with a fairly narrow pattern to work with the width I had available, and am happy with it.
Our new kitten Appa was helping me with the cording.
Then it was finally time for the sleeves of giant ridiculousness. Bobo had to help me cut them out. Each sleeve uses a full yard of fabric! I had to cut them 2.25" wider at the center so I could do the pin tucks on the lower arm like in my inspiration gown.
I'm terrible at pin tucks, but I tried my hardest to keep them neat using my 1/8" foot. I didn't line the sleeves because the taffeta is pretty stiff on its own, so I piped the lower edges.
Here's the whole thing with the giant sleeves! That's without sleeve plumpers!
Close-up of the finished neckline, which I'm happy with.
And a sleeve close-up.
I've decided to keep the skirt and bodice separate. I'm attaching a placket to the skirt and everything needs closures. I hate sewing hooks and eyes, sigh. But otherwise it's finished! Next up, a pelerine and bonnet, and work on the equally ridiculous hair.


